Installation & usage guide:
1. Download & Install MyPi Server.
2. Run & test MyPi Server.
3. Setting Dynamic DNS.
4. Load MyPi Server on boot.
5. Server Settings & GPIO configuration.
6. Watch MyPi Demo on YouTube.
7. Watch this Tutorial on YouTube.
8. Relays and switches connection diagram.
Download & Install MyPi TCP Server:
- Open Termial or connect to your Raspberry Pi by ssh.
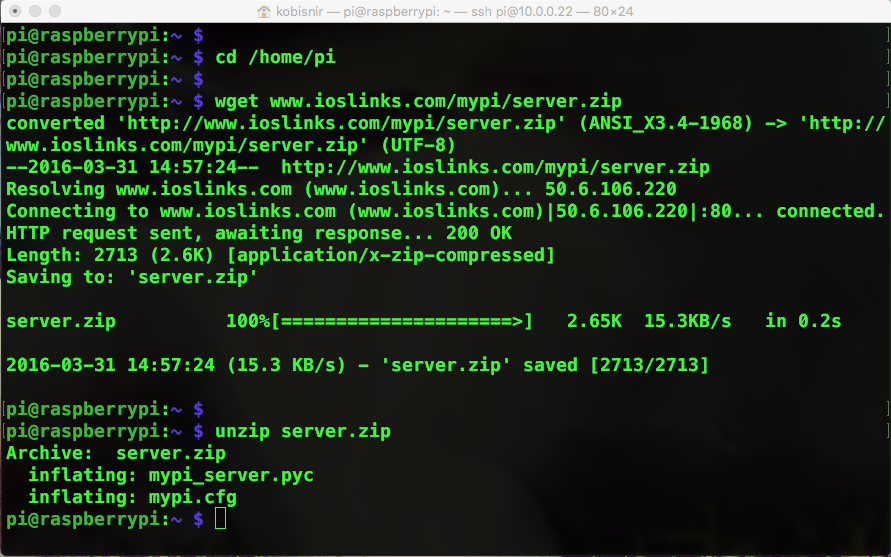
- Change the current directory to /home/pi by typing:
cd /home/pi
- Remove older version of MyPi by typing:
rm server.zip
rm mypi_server.pyc
rm mypi.cfg
- Download the latest version of MyPi Server (for python 3.9.x and above) by typing:
wget www.ioslinks.com/mypi/server.zip
If you are using python 3.7.x download compatible version by typing:wget www.ioslinks.com/mypi/server2.0.zip
If you are using python 3.5.x download compatible version by typing:wget www.ioslinks.com/mypi/server1.5.zip
If you are using python 3.4.2 download compatible version by typing:wget www.ioslinks.com/mypi/342/server.zip
- Unzip the package by typing:
unzip server.zip
Run & test MyPi Server:
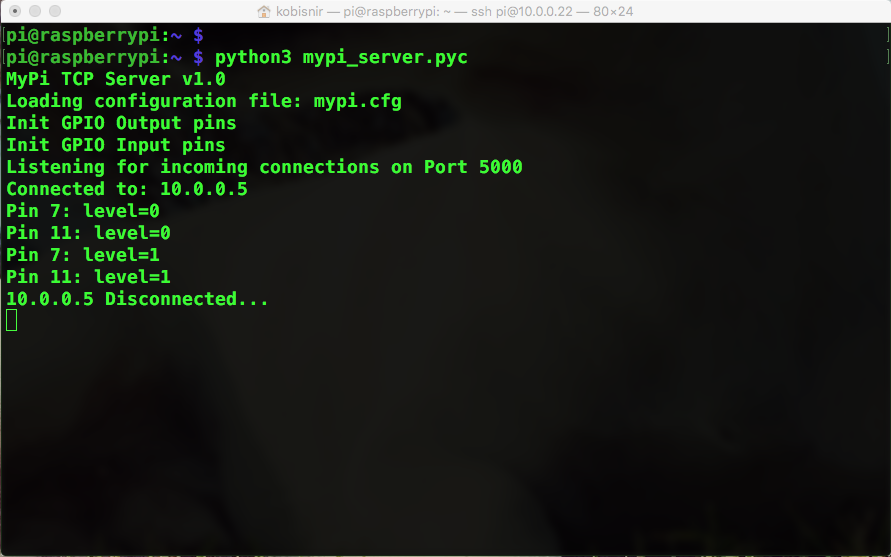
- Start MyPi Server by typing:
python3 mypi_server.pyc
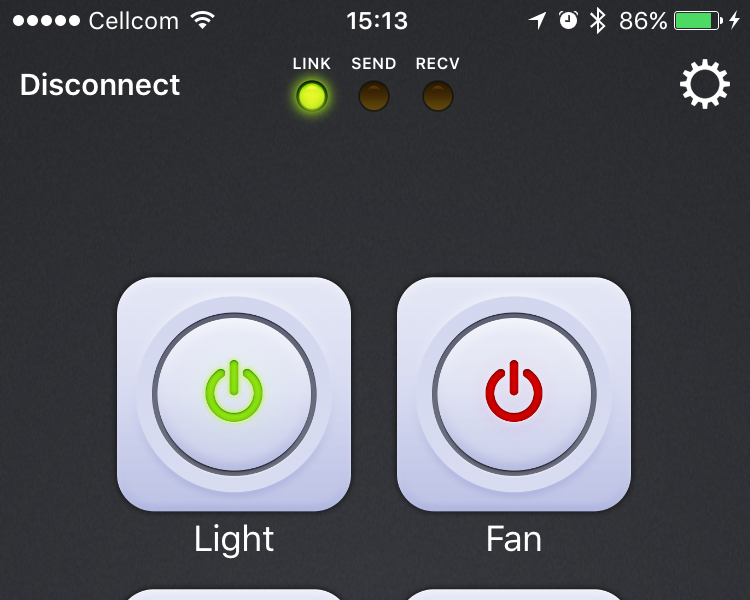
- Launch MyPi iOS App and click the gear icon.
- Replace IP with your Raspberry Pi IP Address.
- Click Save and from the main screen click Connect.
- Tap any button to chage GPIO status.

Load MyPi Server on boot:
- Stop MyPi Server by pressing CTRL C twice.
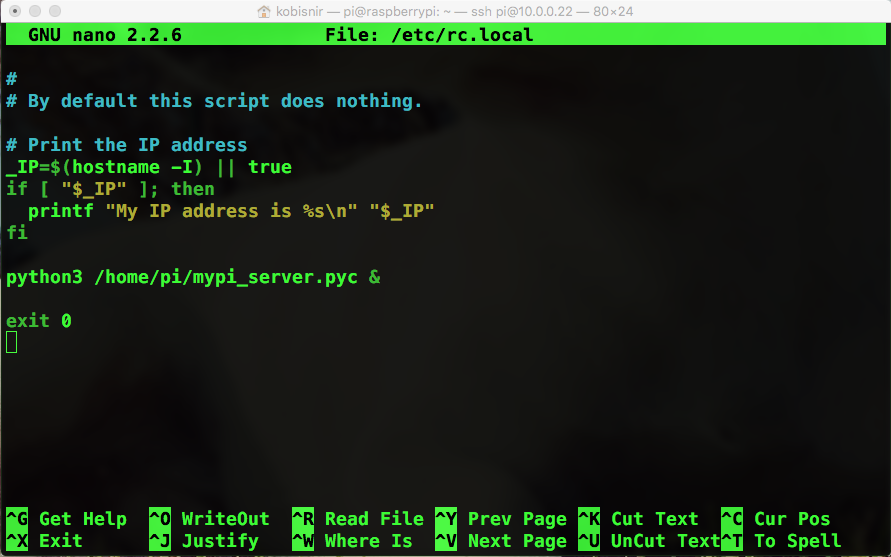
- Edit rc.local file by typing:
sudo nano /etc/rc.local
- Scroll down and type the following command BEFORE the exit 0 line:
python3 /home/pi/mypi_server.pyc &
- Save changes by pressing CTRL O and ENTER.
- Quit by pressing CTRL X.
- Reboot your Raspberry Pi by typing:
sudo reboot
Server Settings & GPIO configuration:
-
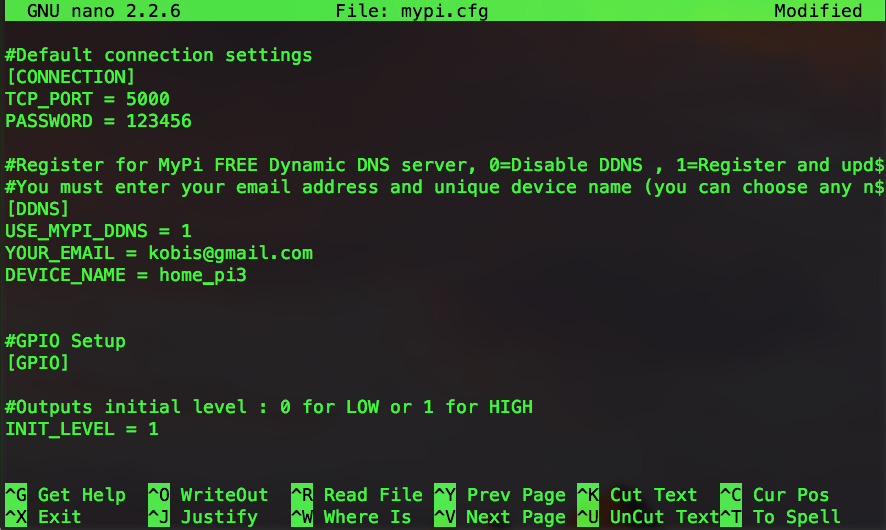
MyPi Default configuration:
- TCP Port : 5000
- Connection Password : 123456 (it is highly recommended to change the default password).
- Dynamic DNS : 0 = off , 1 = Register and use MyPi Dynamic DNS server.
- Initial output level : 1
- Output pins : 7,11,13,15,16,18,19,21
- Input pins : 29,31,32,33,36,37,23,24
- Output modes : T = Toggle , M = Momentary.
- Delay : 1.0 (in seconds, applys only when output mode is momentary).
-
You can chage the default configuration by performing the following steps:
- Open Termial or connect to your Raspberry Pi by ssh.
- Edit mypi.cfg file by typing:
sudo nano /home/pi/mypi.cfg
- You can change the default Port and Password, initial GPIO output level, You can also change the physical pin number for each Input or Output list.
- If you change the default Port or Password make sure to update the iOS App as well.
- Save changes by pressing CTRL O and ENTER.
- Quit by pressing CTRL X.
- Reboot your Raspberry Pi by typing:
sudo reboot

Setting Dynamic DNS:
- MyPi Dynamic DNS let you connect your Pi without setting IP Address, you will be able to connect it even if you are not using the same LAN network. (in case you wish to control your Pi when you are not home).
*** If your Pi is connected to a router you must configure port forwarding to the Pi's static IP Address. - Open Termial or connect to your Raspberry Pi by ssh.
- Edit mypi.cfg file by typing:
sudo nano /home/pi/mypi.cfg
- Enable MyPi Dynamic DNS by setting USE_MYPI_DDNS to 1 instead of 0.
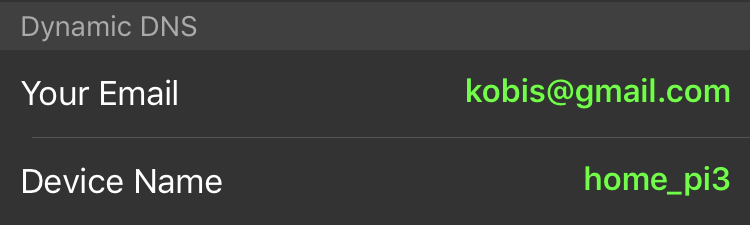
- Set your email address, MyPi will automatically register your Pi and update the DNS record evey 30 minutes.
- Set a unique Device Name, you can set any name you wish, for example: main_home_pi , garage_pi , lights_controller.
- Save changes by pressing CTRL O and ENTER.
- Quit by pressing CTRL X.
- Reboot your Raspberry Pi by typing:
sudo reboot
- Open MyPi App and set the same email address , device name and click save.
- Go back main screen and click connect.
- MyPi App will automatically detect your Pi's IP Address and connect it.
MyPi demo:
MyPi Server installation guide:
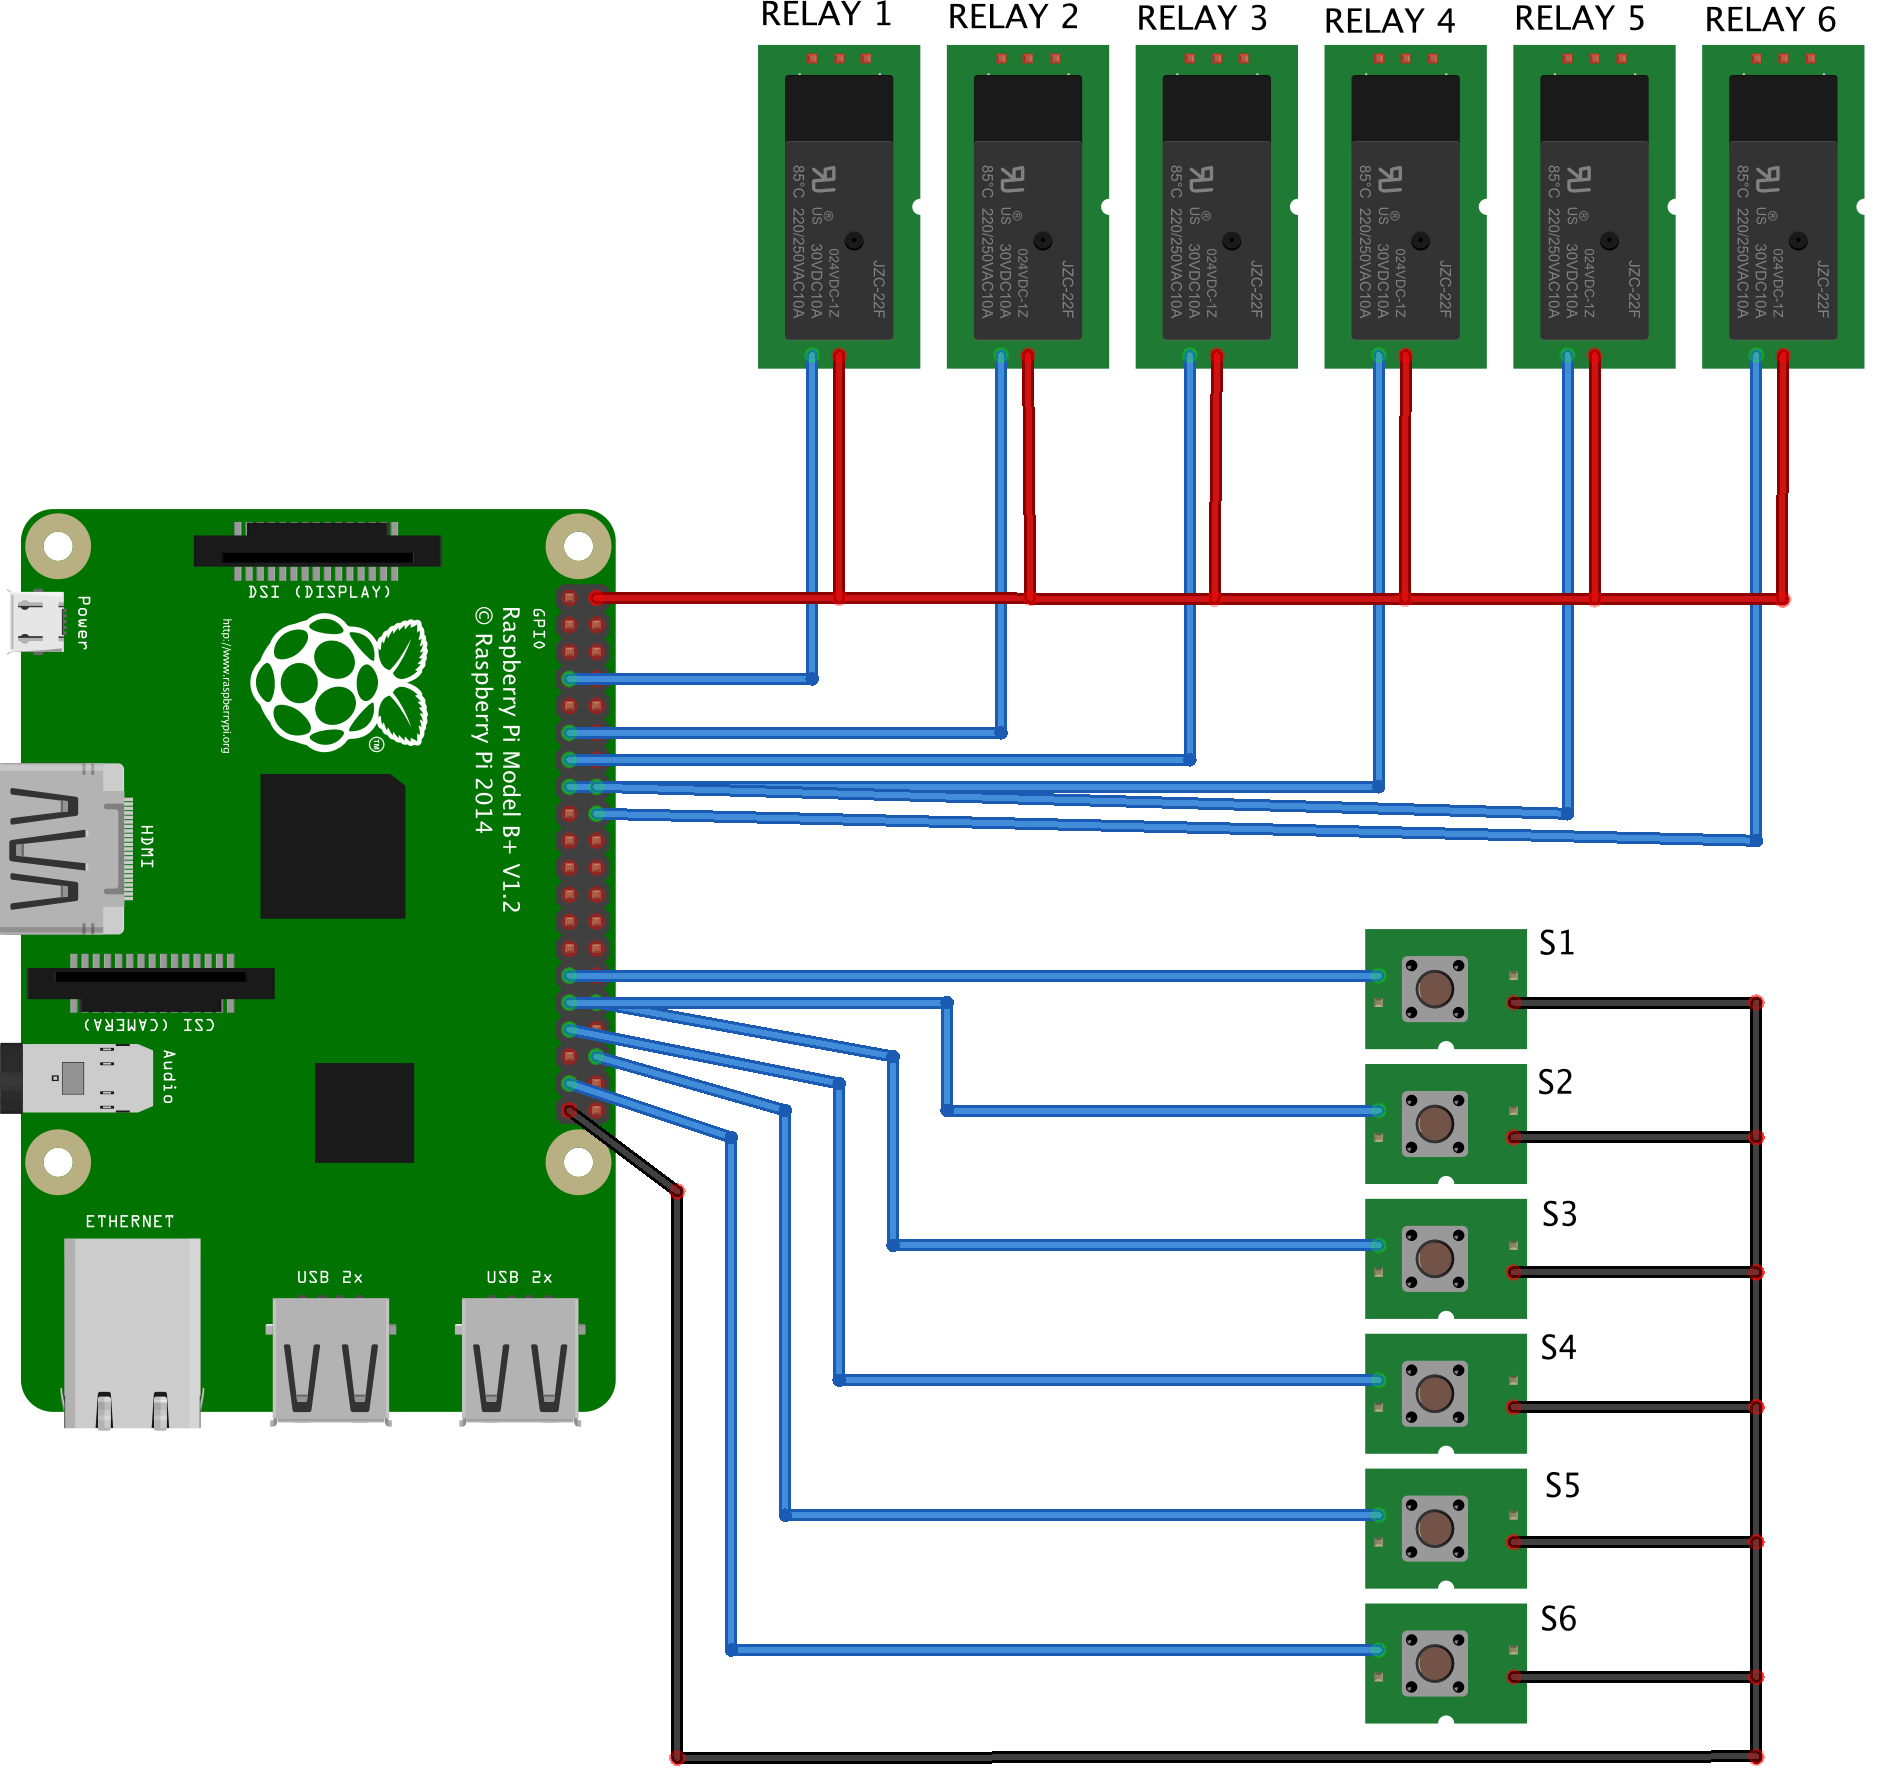
Relays and switches connection diagram.
- Connect your relays to the output pins : 7,11,13,15,16,18,19,21
- Connect your switches to the input pins : 29,31,32,33,36,37,23,24